Showing posts with label Tags bags boxes and more. Show all posts

Sunday, October 21, 2012

Purple People Eater Treats

Thanks for joining us for our

If you just stumbled in on our wonderful blog hop, please jump over to Nicolette's blog at Beyond Scrapin' so you don't miss a thing.


"It was a one-eyed, one-horned, flyin' purple people eater
(One-eyed, one-horned, flyin' purple people eater)
A one-eyed, one-horned, flyin' purple people eater
Sure looks strange to me!"
Sheb Wooley, 1958
I created this treat box today... the song lyrics repeating in my head
over and over. I cut the nut cup from Tags, Bags, Boxes
and More (at 6", the largest it could go to fit on my 12" X 12" cutting mat).

The purple monster is from Mini Monsters, it started out as a three
horned monster, but to go with the song, I HAD to alter him. :) He's
cut at 3" - I only used scraps for all the monster parts.

This yellow and orange striped paper is from a .97 cents Studio G
paper pack. I backed it with some yellow card stock. I just knew that it would 
need the extra support. I used Sticky Strip to hold it all together and added 
some foam tape to attach the monster parts.

I hand cut this little tag and used a Inkadinkado stamp from last year. 
I attached it to the orange ribbon handle with a simple brad.

Here is my monster's tail. This has got to be my favorite monster from 
the Mini Monsters cart. I think this is like the third time I've cut him.

Some black stitches finish off the treat container. I used a black Glaze pen make by Sakura (Gelly Roll). Add some candy and you are good to go! :)

Thanks for stopping by, please don't forget to comment for your chance to win a prize goody bag. Leave an email address 'cause I'll drop you an email if you win!! :)

Your next stop is:

Thursday, August 30, 2012

Summer "thanks" card

I am a proud member of Cori's Design Team over at Ginger Snaps Scraps and today I have a fun card to share with you!

I love making shaped cards (as you'll know if you are regular visitor) but I like to look beyond the usual shapes for my inspiration. This card, believe it or not, is created by re-sizing a tag shape.
I love summer!! This would be a wonderful birthday card for someone special, but this one is a fun thank you card.

My little sentiment tag is hand cut to about 3/4" x 2". The stamp is from Scrappy Mom's Stamps. I mounted the tag up on pop dots and tucked the end under the tree just a little. I finished off the tag with some white gel pen stitches.

The sun is from Celebrate with Flourish, cut at 1 3/4". I added Glossy Accents to the center (it's still wet in the picture). The clouds are from Serenade, cut at 1" and 1 1/4". Both layers of the sun were inked with orange ink, on the clouds I used blue ink.

This tree is from Simply Charmed, all layers cut at 3 1/4". The grass is from Paper Doll Dress up cut at 1" and 3/4". The little bird is from Serenade, cut at 3/4".  I also used green and clear Glaze pens to add the details on the tree. I inked the tree and grass with green ink and the sky layer was detailed with the same blue ink I used on the clouds.

I hand drew the little daises with my white gel pen and added the centers with a yellow self adhesive rhinestones.

Here you can see the full card base.  I used Tags, Bags, Boxes and More cart.  This tag is from page 91 (button #10) using the mirror creative feature. I sized the base to 4 1/4" x 11". The front layers were sized down by 1/4" each. The black layer measures 4" x 5 1/4" and the blue sky layer measures 3 3/4" x 5".

We'd love if you'd jump over to the Ginger Snap Scraps blog and check out what the other DT ladies have come up with.  Don't forget you can pick up lots of papercrafting supplies at

Saturday, August 25, 2012

Gift for a teacher : Apple Card Set

Welcome to our Back To School Blog Hop with the
Ginger Snap Scraps Design Team!

If you came from Ann @ November Rose, you are in the right place.
If you just came across this hop and would like to start from the beginning, please go back to 


Today I have a card set teacher's gift to share with you.  I made a set of ten of these adorable pieces apple card for my boy's teachers.
I used red, black and white generic card stock, patterned card stock from the DCWV's Grade School mat stack, a Studio G rubber stamp (but any stamp with an outline would work) and some craft string (or twine).  In addition, I cut a box for the set of A2 cards to be gifted in.  

The little apples are stamped onto a 2" x 2" piece of white card stock, the black layer is 2 1/4" x 2 1/4" and the red layer is 2 1/2" x 2 1/2".  I stamped the apple onto red polka-dot paper (DCWV, stack 7), brown (for the stem), green (for the leaf) and white (for the apple center).  I cut each of these pieces out so I could glue them together for the finished apple.  It was quite time consuming, but I think they turned out wonderful!!

Here is how they look finished.  I used some Zig precision glue to assemble the apples. 

The red card base measures 5 1/2" x 4 1/4".  I wrapped three layers of craft string around the patterned card stock before I used my ATG tape to assemble the card front. I then used my ATG tape to secure the apple layer to the center of the card front.

I made ten cards for each teacher.  Each card has the same apple decoration, but the patterned card stock is all different -- all from DCWV's Grade School mat stack.

I love how they all go together! :)

One last look at the card design. <3 div="div">
I used Tags, Bags, Boxes and More to make the gift boxes (the matchbox on button 43 or page 124). The window is from Just Because Cards. To complete the window, I recycled some Cricut Cartridge packaging!

Here is the Gypsy file for the box.  It is sized to fit the A2 cards with envelopes.

I tied the box closed with some more string and made a little matching tag and voila!  It's done. 

Here's the second box, the little frame around the window is different, but everything else is the same.
In case you missed it, here is the download file again:

Thanks for visiting me today. 

Before you jump to the next stop, please leave a comment
(and don't forget your contact info) 
to be entered in my drawing for some blog candy...
a $20.00 gift card to either
Michael's or Joanns -- winner's choice!!!
Drawing will take place on Monday, September 4th, 2012.
- I have another blog hop next week and will email all the winners at the same time-
FYI: I don't post winners to my blog, I email the winner(s) directly.

To be eligible for the grand prize -

Your next stop in the blog hop is:
Connie @ Connie Can Crop

Wednesday, January 25, 2012

Valentine Candy Pouches

Today is another Craft Junkie Too Design Team day. I can't even begin to tell you how much I love being on Tracy's Design Team!! Her awesome assignments are just a small part of it. 

 The challenge for this week is:
Valentine Treats 
Make a project that can be easily mass produced for classroom goodies.

My seven year old, Owen, loves to have his picture on the goodies he brings to school. So this is the adorable project we came up with for this years Valentine treats.

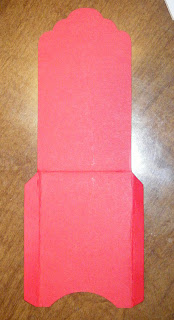
This treat pouch is from Tags, Bags, Boxes and More cut at 7 1/2" using red generic cardstock. I scored the lines and together we folded and sealed the pouch with Scor-Tape.

Some white gel pen stitches are easy enough for my seven year old (although his are not consistent in size like mine are) to help with.

Although this little treat pouch could hold much more candy, Owen wanted Tootsie Roll Pops. To keep them from sliding out, I added a little hot glue to the end of the sucker stick and behind the head of the candy.

We picked out a picture and sized it to fit our pouch (our finished pic measures 2 1/2" x 2") and we printed them out. Four pictures fit onto one 4" x 6" sheet of photo paper. The adorable font is called "Cheri"... I love that is has hearts for the accents. You can download it for free at DaFont.com.

We made little "to:" and "from:" tags for the back too. We used the same font as the sentiment on the front. I left the "to:" section blank so Owen can hand-write the rest.

That's it, please head over to Tracy's blog and see what

Thursday, October 20, 2011

Purple People Eater!

"It was a one-eyed, one-horned, flyin' purple people eater
(One-eyed, one-horned, flyin' purple people eater)
A one-eyed, one-horned, flyin' purple people eater
Sure looks strange to me!"
Sheb Wooley, 1958
I created this treat box today... the song lyrics repeating in my head
over and over. I cut the nut cup from Tags, Bags, Boxes
and More (at 6", the largest it could go to fit on my 12" X 12" cutting mat).

The purple monster is from Mini Monsters, it started out as a three
horned monster, but to go with the song, I HAD to alter him. :) He's
cut at 3" - I only used scraps for all the monster parts.

This yellow and orange striped paper is from a .97 cents Studio G
paper pack. I backed it with some yellow card stock. I just knew that it would 
need the extra support. I used Sticky Strip to hold it all together and added 
some foam tape to attach the monster parts.

I hand cut this little tag and used a Inkadinkado stamp from last year. 
I attached it to the orange ribbon handle with a simple brad.

Here is my monster's tail. This has got to be my favorite monster from 
the Mini Monsters cart. I think this is like the third time I've cut him.

Some black stitches finish off the treat container. I used a black Glaze pen make by Sakura (Gelly Roll). Add some candy and you are good to go! :)

Challenges:

Saturday, September 24, 2011

Pieced Apple Teacher Card Sets


Welcome to the Back to School Blog Hop!! If you came from Lisa's blog, you are in the right place.... if you just stumbled upon the hop, please head back to Jamie's blog where the hop begins, you don't want to miss a stop.

Today I have a card set teacher's gift to share with you.  I made a set of ten of these adorable pieces apple card for my boy's teachers.
I used red, black and white generic card stock, patterned card stock from the DCWV's Grade School mat stack, a Studio G rubber stamp and some craft string.  In addition, I cut a box for the set of A2 cards to be gifted in.  

The little apples are stamped onto a 2" x 2" piece of white card stock, the black layer is 2 1/4" x 2 1/4" and the red layer is 2 1/2" x 2 1/2".  I stamped the apple onto red polka-dot paper (DCWV, stack 7), brown (for the stem), green (for the leaf) and white (for the apple center).  I cut each of these pieces out so I could glue them together for the finished apple.  It was quite time consuming, but I think they turned out wonderful!!

Here is how they look finished.  I used some Tombo Mono Liquid glue to assemble the apples. 

The red card base measures 5 1/2" x 4 1/4".  I wrapped three layers of craft string around the patterned card stock before I used my ATG tape to assemble the card front. I then used my ATG tape to secure the apple layer to the center of the card front.

I made ten cards for each teacher.  Each card has the same apple decoration, but the patterned card stock is all different -- all from DCWV's Grade School mat stack.

I love how they all go together! :)

One last look at the card design. <3

I used Tags, Bags, Boxes and More to make the gift boxes (the matchbox on button 43 or page 124). The window is from Just Because Cards. To complete the window, I recycled some Cricut Cartridge packaging!

Here is the Gypsy file for the box.  It is sized to fit the A2 cards with envelopes.

I tied the box closed with some more string and made a little matching tag and voila!  It's done. 

Here's the second box, the little frame around the window is different, but everything else is the same.
In case you missed it, here is the download file again:

Thanks for stopping by today, your next hop stop is Gina @ California Scrappin'.... but before you go, please leave me a comment (and become a follower) for the chance to win my blog candy.
  I don't have a picture, but I am giving away a stamp block and 10 sets of stamps!! 

Monday, July 25, 2011

Easel Birthday Card

Today is a Digital Design Team Day over at Paper Playtime! :) 
The theme this time to make a SUMMER project and include a digital image.

Today I am using an image from Dude Time Doodles
I am working with their image titled "Hammock Harold."  
The front features the digi of Harold lounging on hammock on a nice summer day... the grass is growing long beneath his feet...
I layered Harold on a piece of grass patterned paper, a layer of black and then a layer of dark green. He's mounted up on pop dots... sitting on a border of craft card stock and then a layer of grid paper from the DCWV "Guy Stack", black and then on the craft card stock easel base. I added a row of three brown brads along the bottom, a craft tag (from TBBM cut @ 1") with a Studio G stamp. The front is finished off with some black inking and a few twists of off white craft twine.

Harold sits up on his easel base... the sentiment tag on the bottom is mounted the same as Harold himself.  I added another strip of craft card stock to hold up the easel layer.  Like the accent border on the card front, I ran it though the "Diamonds in the rough" Cuttlebug embossing folder before inking the edges and the surface. This layer is also attached with pop dots.

I colored Harold in using Photoshop. I even used the "grass" painting brush to get that cool over-grown look on Harold's lawn.  I added some clouds to the background and finished off the sky with a blue gradient layer.

This sentiment is one that comes with the "Hammock Harold" digi set from Dude Time Doodles.

While I was at it, I went ahead and made two of these cards. I love doing cards in multiples... each additional card doesn't take too much more time than one card! :)


Now, head on over to Paper Playtime and enter in the Summer Digi Challenge!
post signature