Showing posts with label Life's A Party. Show all posts

Tuesday, September 11, 2012

Captain America Shield Shaped Card

Today marks the start of another Die Cuttin' Divas Challenge!!
This weeks theme is:
School Colors!!

The theme this week is School Colors... that can mean make a project with your local University or Public School colors, maybe even your old College colors?

So, my sons go to Orchards Elementary school here in Washington. The school colors are Blue, Red and White and while I automatically thought 4th of July, I came up with the project to honor an all american super hero: Captain America. This is a 3-d card to resemble his shield and will be a wonderful card for my nephew who is having an Avengers party at the end of the month.

The card measures 5", the circle layers are as follows:
5", 4 1/4", 3 3/4" and 3 1/4" and the star is 2 3/4". I grabbed all these shapes from Life's a Party because I love the star, but you can use any cartridge that has these basic shapes.

I inked the edges of all the layers with some brown Memento ink and a sponge, then I added some more aging to make the shield look battle-worn. I used a paper shaper to curve the assembled shield to give it dimension and put the card together with a layer of pop dots through the middle but glued the rim directly to the card base.

All that inking and shaping gave the shield this wonderful dimension. I'm sure the birthday boy will just LOVE it. :)

We'd love for you to come on over and play along with us at Die Cuttin' Divas!
This weeks theme is:
School Colors!!

The sponsor for the Challenge prize is:

Tuesday, May 29, 2012

B-Ball B-day

Today marks the start of another challenge over at Die Cuttin' Divas.
This week the challenge is:

This is a standard A2 (4 1/4" x 5 1/2") card. I grabbed this paper on clearance at Joann's. An orange cardstock base, black cardstock layer, and the patterned paper full of basketballs, it really just screams boy card! I added some orange and white twine to add interest. The orange and patterned paper is inked with brown ink.

I added three black brads and a happy birthday sentiment stamp from Studio G.

This basketball is cut at 3" from Life's a Party. I embossed the orange layer using the Bubbles Cuttlebug folder and inked with brown ink to add texture and interest. This basketball is also attached with an Action Wobble. That sure makes this card extra fun!!

The inside of the card is outfitted to match the front. I love adding the layers to the inside. 

We'd love for you to stop by Die Cuttin' Divas and enter the challenge!

The sponsor this week is Joy's Life
Joy's life.com

Thursday, March 29, 2012

Rainy Day Craft : Bongo Boards

Thanks for joining the Thankful Thursday Design Team for the 
If you've come from Sharon at  Simply Sweet by Sharon, you're in the right place.  If not, please jump back to Jenny's blog to start at the beginning... you don't want to miss a stop!

Today, my boys and I have this super fun indoor project to share with you. It's wonderful for those rainy weekend days when the kiddos have lots of extra energy to burn!
We found this project in the Family Fun Magazine (it was in the February issue). My boys were so excited, we ran out to Lowes right away!  These bongo boards are fun balancing toys that are easy to use inside or out. The idea is to balance on the board with both ends in the air, centered on the PVC tube.

To make one bongo board, you'll need:
Pencil and ruler
a board (10"- 12" wide by 36" long)
Duct tape (colors or patterns are wonderful)
a pool noodle (left over from summer is fine)
glue gun and glue sticks
PVC pipe (2" or 3" around and 36" long) with matching end caps
PVC glue (optional)

Your first step is to glue the end caps onto the PVC pipe and let them dry.
Next, apply the duct tape to the board. Leave a 1 1/2" of each end without tape... this will make it easier to attach the padded ends to the board. Stripes are easy enough to do, but you could make patterns or other designs too. You could hand paint stripes or patterns too, but as my 7 year-old says, "Duct tape is better 'cause you can play right away and not wait for the paint to dry!"

Cut a pool noodle to fit the end of your board. Use hot glue to attach it. The pool noodle is used to protect your floor when the bongo board is being used. See the next picture for more details:

First cut the pool noodle to length and then split it down the side. This is how it'll look. Glue the long ends of the pool noodle that touch the board.

Okay, by now you have the basic bongo board. If your crafty family is anything like mine, you're not done yet!! My boys and I used my Cricut and vinyl to customize the boards. We had a BLAST on this step!

Here is my 9 year-old, Bryce's board. He cut lots of white stars and scattered them all over. His name is 2" cut from Life's a Party.

My 7-year-old went with a rockstar look!! We cut the guitar out in two pieces (a total size of 24") and cut his  name out too (2"). All cuts are from Life's a Party. He used some left over white stars to finish off his bongo board. He loves that it doubles as a play guitar! :)

And here are the Bongo Boards in action!! 

Don't they look like they are having a BLAST!

Thanks for visiting me today. 
Before you jump to the next stop, please leave a comment
(and don't forget your contact info) 
to be entered in my drawing for some blog candy...
a $20.00 gift card to either
Michael's or Joanns -- winner's choice!!!
Drawing will take place on Monday, April 2nd, 2012.

Your next stop in the blog hop is:

Wednesday, March 21, 2012

Easter Carrot Boxes and Peppermint Bunnies

Today is another Craft Junkie Too Design Team day. I can't even begin to tell you how much I love being on Tracy's Design Team!! Her awesome assignments are just a small part of it. 

 The challenge for this week is:
Make a 3-D Easter Project

I made this carrot shaped treat box for all my nieces and nephews as well as my two sons. The box is from Life's a Party, cut at 9 1/2". I used orange cardstock, but patterned paper would make this carrot even more adorable! :)

This is how the flap works... I made the holes a little wider with a small slot hole punch, tied a bundle of green plaid ribbon (a total of 5 eight inch pieces) and attached it to the inside of the first large flap. So now to close it you just feed the ribbon through the second large flap and it stays put pretty well. 

The little bunny is from Simply Charmed (cut at 2 1/2") and I used a Wide Eyed and Bushy Tailed face stamp from Peachy Keen. I just love those little faces!

See?? How cute is that! I added some details with a Glaze gel pen too.

I added a bow (tied with my Bow-Easy).

Here are a couple of my carrots! They'd look adorable embossed with the Distressed Stripes embossing folder, but for these two I just added stripe accents with an orange gel pen.

Today, I am also sharing the class treats that my two boys are taking in to school:


 My sons and I are making these cute bunnies for classroom goodies for Easter.  They turned out so cute! :)

First off, I know you are thinking it already...
"Where in the heck is the Gypsy cut file for these A-DOR-A-BLE bunnies? Cheryl always shares her Gypsy files!!"
Well, here it is:

To make these yummy bunnies you'll need a Gypsy, the Gypsy Wanderings cart and these other supplies:
Peachy Keen face parts stamp set (or draw on the face by hand)
ATG glue or other glue runner
Scotch Quick Dry Glue
Tweezers
tape
Ink pad 
Peppermint patties candies


See how cute a personalized stamp is? I love these and they only cost $6 each.
We cut out all out pieces on the Gypsy. On my file you'll see one layer for the head (including the welded ears), one layer for the faces (including the nose cut out), and one layer for the inside of the ears.


With the noses cut out of the faces, we just lined up some Peachy Keen face parts on our stamp block.


Then we flipped our faces and taped a piece of pink card stock to the cover the nose hole.


We also glued on the inside of the ears using Scotch Quick Dry Glue.
How do you like our bunny parts? :)


Next I applied ATG tape to the face and head pieces and my boys put them all together, sandwiching the peppermint patties in-between.  So cute and they really don't take too long. We put 50 of them together in just over an hour.


Here are our happy bunnies.


What an adorable side shot, huh!


We made a tag to match our bunnies.  Here I clipped off the ends of the ear parts. The "Happy Easter" stamp is from Close to my Heart.


We put 25 of the bunnies in one of these $1.50 paint pails from Joann's. We added some plastic Easter grass and some sheer ribbon to the outside and we were done.


So cute right!  Now download the Gypsy file and take some time to craft with your kids today! 
In case you missed it earlier, here is the Gypsy file again:

That's it, please head over to Tracy's blog and see what

Tuesday, February 14, 2012

Love you just the way you are

First of all, 
Happy Valentine's Day
to you all!! 

Today marks another Die Cuttin' Divas challenge. This week it's:
Color challenge : red, pink, black or white + buttons

My heart shaped card is for my hubby!! The card base is from Life's a Party (sized to 5 1/2" wide). The base includes two layers, the scalloped card front and the heart insert. It makes for a very easy card to put together. 

I used white cardstock for the base, red for the scalloped layer and a Studio G .97cent patterned paper for the card front.

I attached three red buttons along the side of the card and topped them off with these wonderful rhinestones. They sure add some wonderful sparkle.

This adorable sentiment stamp is from Stampin' Up's "Sprinkled Expressions. I got the set free with a recent order from my Stampin' Up rep, Kadie. I stamped the sentiment on a 3/4" heart and matted it with a slightly larger red heart.

I used my Bow Easy to tie this cute little bow using white satin ribbon and attached it to a little strip of red cardstock punched with a Fiskars Scalloped Border punch. I think it goes very well with the white gel pen stitching.

Now please take some time this week to create and link up on the Die Cuttin' Divas blog.
The theme is a color challenge:
 red, pink, black or white + buttons

Tuesday, November 1, 2011

Football Shaped Card

Today marks the start of another Die Cuttin' Diva's Challenge. The theme this week is 
Football
It's no secret that I love shaped cards!! I love all the texture on this one! :) Using Life's a Party I cut the football shape. I cut it with kraft card stock and embossed it for texture (I think the embossing folder is "bubbles" but please correct me if I'm wrong) and inked it with some brown ink and a finger dauber. I just couldn't resist setting some eyelets with my Crop a Dile and lacing up the football. 

I simple sentiment finishes off the front of the card. I corrected this little circle by printing it using Honey Script (24 point) and punching it with my 1 1/2" circle punch. A couple of pop dots and I am done.

Like other shaped cards I make, I cut a shaped card base (welded using my Gypsy) but cut an extra card front. This lets me hide the folded edge on the card base.

Please take some crafting time to enter this terrific challenge over at Die Cuttin' Divas. It sure is a great time to add to your manly card stash! :)

Challenges:

Thursday, September 15, 2011

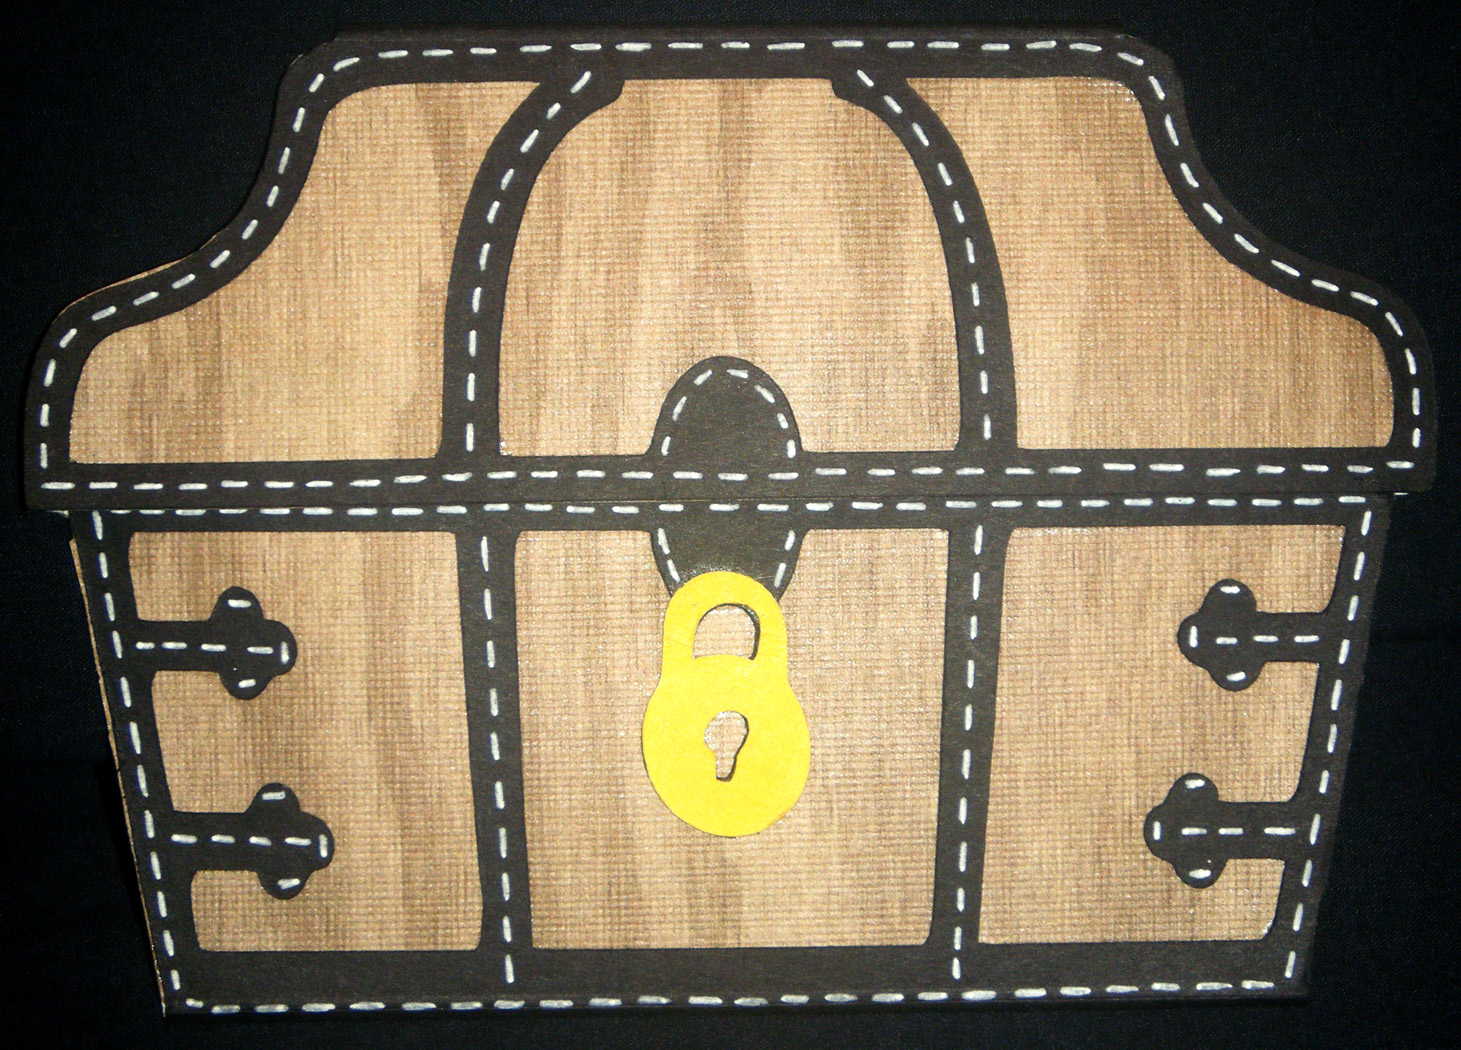
Arrrrgg!! It's a pirate treasure chest!

Today is another wonderful Thankful Thursday Design Team Day over at Crazy About Cricut.  The whole reason for Thankful Thursday is to encourage crafters to get their kids (or the kids in their lives) and craft away!! I absolutely LOVE crafting with my boys... we always have a terrific time!!

The theme this week is 
"Pirates"
in honor  "talk Like a Pirate Day" (September 19th).

We used the card feature on Life's a Party and cut the treasure chest at 5 1/2" wide to fit a standard A2 envelope. My 8 year-old, Bryce, loves to design on my Gypsy, so this was his job! :) The treasure chest is DCWV wood grain paper from The Green Stack (the black is generic card stock).

I added the gel pen doodling on the black hardware.

When you open the top of the treasure chest, there is a pile of gold (accented with Platinum Stickles) and a gift card in the pocket.... and something my 6 year-old, Owen, said we just needed to add...

Can you see what the pirate must-have is?? :)

Yep, it's an eye-patch!! :)  Together we came up with a sentiment... it reads "Hope you have a Pirate-tastic day Matey!" in Dinosauria font.  We worked very hard to come up with a sentiment that could be a birthday message but would also fit on "talk like a pirate" day!
  
More gel pen stitches on the eye-patch. 

We talked it over and my boys decided to add red rhinestones to the skulls eyes (instead of clear or black) because it would make him more "piratey" looking. Bryce set some eyelets and tied the elastic cording so the eye-patch could be worn right away.

Here is Owen, modeling the eye-patch and showing his toothless smile (he lost four teeth in about a week and a half).

Here is the sentiment we used if you'd like it. Just click on it to open the full size preview and then right-click to save it to your computer.

Please jump over to Crazy About Cricut and take a look at what Jenny and the other Thankful Thursday Designers have come up with for "Pirates!"
Craft Junkie Too Friend