Showing posts with label printables. Show all posts

Wednesday, November 27, 2013

Elf on the Shelf Ideas

Hi Everyone,

Well, last year I was not very active on my blog during this time of year. You know how the holidays go....
Anyway, my boys had an Elf assigned to them by the Big Man in the Red Suit. He was not an official "Elf on the Shelf" but he was much cheaper and my boys like getting a new Elf each year and that just wouldn't be practical with the $30+ OFFICIAL elf. :)

Okay, so I wanted to share the elf antics that our Elf, Tom, was up to last year. He was discovered each morning, having been up to something. Sometimes it was just fun, sometimes it was down right creative!! :)

We do not have the "no touch" rule like the official elf does, I just know if it were me, I couldn't resist touching as a kid. Here are his adventures, one for each day from December 1st through December 24th.


And now, onto the Antics. :)

Day 1: He made a pumpkin snowman out of those little decorative pumpkins. It was held together with toothpicks and decorated with buttons. 

Day 2: He toilet papered the Christmas tree. My boys thought this one was so funny!

Day 3: Tom set up a train under the Christmas tree. We caught him riding on the train.

Day 4: Tom was watching the movie Elf on the couch, he even popped some microwave popcorn.

Day 5: My boy's behavior wasn't wonderful the day before, so on day 5, Tom brought a letter from Santa instead of fun. 
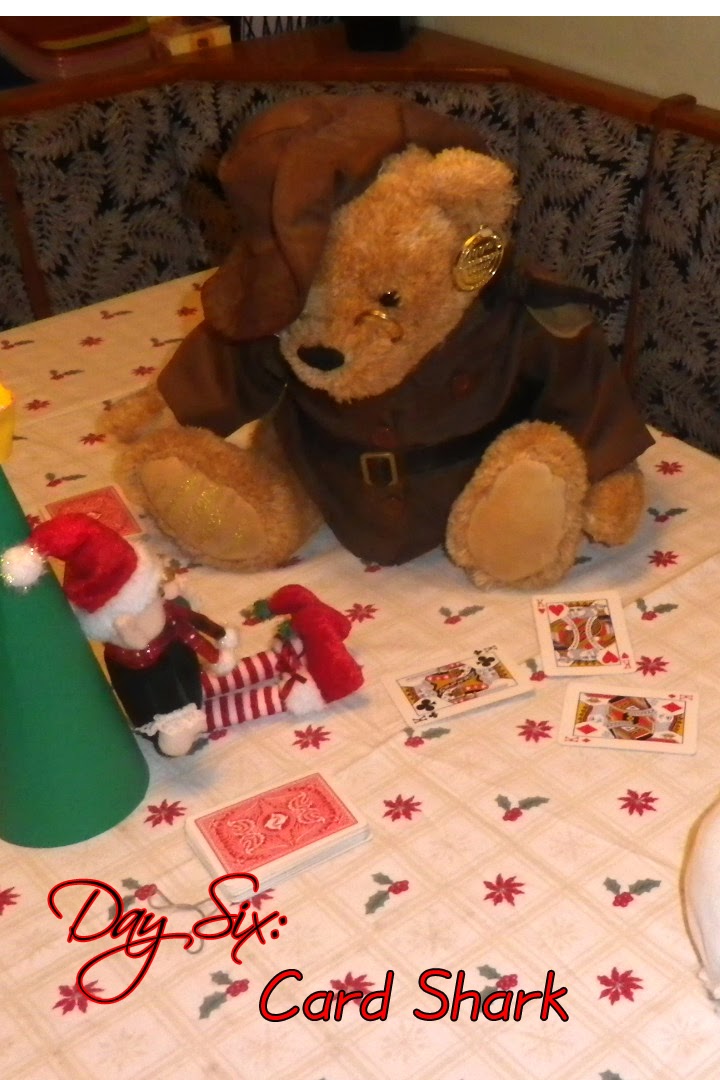
Day 6: Tom was caught in the middle of a card game with a couple other stuffed toys.

Day 7: He gift wrapped up all the breakfast foods for the boys... including spoons, bowls, vitamins and the box of cereal. :)

Day 8: Tom decorated our bathroom!! It was all decked out with lights, snowflakes, a little Christmas tree and a wintery new shower curtain. 

Day 9: My boys LOVE Legos, so on Day 9, Tom brought them the book, "The Christmas Story" told in Lego Bricks and Minifigs. They loved it. :) Tom even had reading glasses on.
 
Day 10: Keeping with the Lego theme, we woke up to find Tom sleeping in a Lego bedroom he'd constructed, complete with nightstand, bed and Christmas tree, he even had legos scattered under his bed like my boys usually do. His blanket was a piece of wrapping paper.

Day 11: Tom delivered bookmarks with the story of the candy cane, a real candy cane and a set of Santa placemats.

Day 12: Tom brought the boys a cute little Santa toy/shelf sitter. He wanted to introduce his old friend and told the story of how Santa got started (the story of St. Nicolas).

Day 13: We were surprised with Tom sitting on the table with a Holiday Funfetti Cake mix, frosting, cupcake liners and a letter from Santa. The letter also included ticket to ride "The Polar Express" and elf-themed jokes and games for the boys to play on the drive to the train station (it was about an hour from us).

Day 14: Apparently Tom missed the North Pole and all the winter snow (we didn't get any last year) so he constructed himself a snowglobe home, complete with snow. All our other snowglobes were set up around Tom's new home.

Day 15: My youngest son loves Angry Birds and received a couple sets of the block toy for his birthday. On day 15, we found Tom in the middle of a game on our dining room table. 

Day 16: Tom was found on the end table, using a candy cane fishing pole to fish for gold fish out of a cup. He even brought his fishing vest and fish basket. 

Day 17: Tom set up a zip-line to ride from the kitchen and across the living room, landing on the Christmas Tree. The boys loved this one so much they made a video. It's on Youtube. :)

Day 18: In honor of the real meaning of Christmas, Tom set up a wall mounted, nativity display. 

Day 19: We found Tom in a heated snowball fight in the kitchen. There were mini marshmallows everywhere. We found lots of "snowballs" mid-flight, strung from the kitchen ceiling. 

Day 20: Tom set up a tire swing. He was riding when we found him, but there was a line of toys waiting for their turn.
Day 21: "Super Tom"! Tom sure was busy! on Day 21, he arrived wearing a cape, mask and under-roos.... Super Tom was there. :)

Day 22: Apparently Tom wasn't cut out to be a super hero.... on Day 22 he was covered with band-aids with a hot water bottle on his head. :(

Day 23: Tom wrapped the boy's door-ways with wrapping paper, essentially sealing them into their bedrooms.  He even remembered to add the bows. :)


Day 24: Tom gave the boys a photo album with pictures of all of his elf adventures during the time he was here visiting. It included a note explaining how Santa will pick him up tonight while he was dropping off the presents, and thanking us for a fun Christmas season. Before we left, we found pics of Tom setting up a camera and tripod on our coffee table. Then we found pics of Santa leaving presents under our tree!! The boys were so amazed!!


This was by far the most fun I've had with the boys, thinking of each of the Elf's adventures. My Facebook friends loved it too, I received lots of feedback when I posted "Adventures of Tom the Elf" each morning. :)


Enjoy your Elf this year, whenever he/she gets there, the Elf is a blessing. I love how the Elf Antics thrilled my boys and just set their imagination on fire! :)

In case you'd like to adopt your own Elf, here is a link to my printable Santa Letters and Elf Passport.

Tuesday, November 26, 2013

Dr. Suess Christmas Subway Art

Hi Everyone,

I just wanted to share some fun Subway Art I created for my Christmas card fronts for this year.

I just love the quote and I've seen it as printables, but not as Subway Art. With the fun trend, I thought it would make a lovely printable for my cards and a wonderful free printable for you too. :) Enjoy.

You can print it as a 8x10 and frame it up for some fun Christmas Decor, or print it for your own Christmas cards too.


Feel free to save this for your own use, but no selling, please.


Thursday, October 25, 2012

Little Monsters Blog Hop

Hi! Thanks for hoping with us along

If you came from Jenny's blog (Crazy About Cricut) you are in the right place.
If you just came across this hop and would like to start from the beginning, please go back to Jenny's blog (Crazy About Cricut).

My project is a Reading Log Bookmark.  These would be fun for a classroom Halloween treat or a simple motivational fun for your young reader.

I created a PDF file that goes with this project. Please feel free to download the file. You are free to use it as much as you'd like for your personal projects, but it is not to be used for commercial purposes. If you'd like to post the PDF or this project on your own website or blog, please link it back to the Cards by CG blog (cardsbycg.blogspot.com).

This is a jpg of the pdf file.
I included three file share programs for you to download with. Hopefully you'll have no
On to the project:
Step 1: Print out the PDF onto card stock. I use white for my projects, but any color will do. You will have enough reading logs for two bookmarks each time you print the pdf file.

Step 2: Cut a book mark from card stock. The measurements are 2 1/4" x 8" - you can cut a total of four bookmarks from one sheet of standard 81/2" x 11" card stock.

Step 3: Cut out the reading logs and mount them on the colored card stock, there will be one side with a large blank spot at the top of the bookmark. This is where you or your child will add decorations (we chose to use Cricut Cuts from Mini Monsters). The second side (the long one) will be added to the back of the bookmark. - see second picture -

Step 4: My kids used the Crop-a-Dial to punch holes in the top of the bookmark to add ribbons.


Step 5: We set eyelets with the Crop-a-Dial.
Step 6: Cut ribbons to add to the top of your bookmarks, we used 8" for each bookmark.


Step 7: Cut your decorations. We used Mini Monsters and our Cricut Expression. All our cuts fit perfectly using 2 1/2" for all layers. Both my 7 and 10 year old sons love using the cricut (as you can see from the pictures)! :)


Step 8: Once everything is cut, assemble your decorations. We used a Zig two-way glue pen for the assembly of each monster cut.

Step 9: Attach the decoration to the top of the bookmark with Action Wobbles (super fun addition for small batches, you may want to use pop dots if making a lot of bookmarks).


Step 10: Have your child write his/her name on the bookmark. Here my 7 year old is using a Gelly Roll white gel pen.


Now my little monsters have their own little monsters to help them read. My 7 year old finished his bookmark and immediately went to his room to pick out a book to read.... if you ask me that is a wonderful result for this little 15 minute project!! :)


Thanks for visiting me today. 
Before you jump to the next stop, please leave a comment
(and don't forget your contact info) 
to be entered in my drawing for some blog candy...
a $20.00 gift card to either
Michael's or Joanns -- winner's choice!!!
Drawing will take place on Monday, November 5th, 2012.
FYI: I don't post winners to my blog, I email the winner(s) directly.


Your next stop in the blog hop is:

Wednesday, November 23, 2011

Elf on the Shelf Printables

Today is another Craft Junkie Too Design Team day. I can't even begin to tell you how much I love being on Tracy's Design Team!! Her awesome assignments are just a small part of it.  The challenge for this week is to make a project to help kick off the holiday season.

To read the complete story of "The Elf on the Shelf" hop by the website, but the general idea is that when your "assigned" elf arrives, you must name him or her and set her on a shelf in your home. Your new elf acts like Santa's little spy, watching to see if your child/ren have been behaving and will earn Santa's gifts. Each night your Elf will return to Santa and report any naughty or nice news. Every night when the elf returns, he or she may choose a new spot to sit. You may not touch the elf after that first day, you don't want to rub off any of the Christmas Magic, do you??  But don't forget, your little elf must be under the tree or by the stockings on Christmas Eve night so s/he can hitch a ride home with Santa.

As much as I love the story of "The Elf on the Shelf" I just knew I could re-create the wonderful story at a fraction of the price. My version includes a printable letter from Santa. He tells a little about the elf, that you must name your elf etc. I've also included the elf passport, this is where you assign your elf it's name.

Here are the parts of my printable kit. For this sample, I used the 1st letter download. This letter includes margins in case you'd like to print of holiday paper you may already have in your stash.

I love that Santa "signed" the letter too! The second letter file is a full page and doesn't leave any margins. You could print it on any paper or full page patterned paper too.

Here is the elf's passport. It's complete with date of issue (please note; we put our Elf on the Shelf out December 1st), date of birth etc. The back includes all the passport stamps your Elf has collected from all over the world.

Here is the little Elf we are using this year. It's a cute little shelf sitter I picked up at a Craft Bazaar.

http://www.4shared.com/photo/Xf18fHdd/Elf_on_the_Shelf_letter_1.html
This letter is the one that has 1" margins all around.

http://www.4shared.com/photo/nbbaeu0Y/Elf_on_the_Shelf_letter_2.html

This is the letter with no margins (for use on full patterned paper or blank paper).


http://www.4shared.com/photo/FZ-txtPN/Elf_on_the_Shelf_passport_-_si.html

This is a single passport. It will print to a full size of 8 1/2" x 5 1/2", fold it in half and seal to complete your passport. I will be laminating ours to keep it from year to year.

http://www.4shared.com/photo/pbzG7zSq/Elf_on_the_Shelf_passport_-_do.html

And in case you have multiple families or grandkids etc you'd like to gift this story to, this is a double passport. It has two per page and each has a different passport number too.