Showing posts with label Queen of my Craftroom. Show all posts

Wednesday, August 17, 2011

Baseball Birthday Extras

I made this cute baseball birthday set today.  When my kids have birthday parties, we almost always have coloring pages or coloring books to match the party theme... so we have to have a matching art caddy right??

I started out with this silverware holder from IKEA. I bought a couple a while back on clearance.

I grabbed some handy dandy storage containers, this one is a clean tin can that would otherwise be recycled... gotta love free supplies. I covered it with patterned paper - DCWV summer stack, cut to 4" x 12". I just used ATG tape to secure it.

Here is my full caddy, each can decorated with coordinating paper and filled with all the supplies we'll need to craft for a birthday party.

Then, I made this panel to decorate the new "art caddy".

I used some more of the same patterned paper, and added a printed pennant and some Cricut cuts.

The bat, cut to 5 1/2" long, is from Boys will be Boys. I inked the edges for dimension and added some little scraps to the handle for the grip.  I attached it with pop dots.

Here is my little pennant. I used "banner" font because it reminded me of a baseball pennant.  I just hand cut this pennant and glued it directly to the front panel.

This baseball is from Life's a Party. I sized it to 2 1/2". Again, I attached it with pop dots.

What party would be complete without goody bags.  So to continue the theme, I added the same bat and ball as before.  I threw some red trim (cut from cardstock scraps) on the top and bottom. The goody bag's pennant is smaller, but used the same font. Instead of more expensive basket filler, I just tucked some candy into a basket style coffee filter (300 to a package from the Dollar Tree) and tied the top.  I also added a bag of fruit snack and a granola bar to the can.

 I thought I'd give you the free baseball pennant file.  If you'd like it, click on the picture or the link below to download it for free via 4 Shared.

Challenges: 

Thursday, July 28, 2011

Sparkling Horse Card

I made this cute glittery card for a horse lovin' little girl that will be turning eight soon.  All the cuts are from Create a Critter, the horse is 3 1/2" and the star is 3".  The background paper from DCWV's Glitter stack, the rest of the card is scraps but I know that the white glitter paper (the star) is also from a DCWV pack.

I always accent CAC cuts by adding a little shine to their eyes with my white gel pen. The horse is attached with pop dots.

My ADORABLE sentiment is from Scrappy Mom's. As you can see, the glitter paper is difficult to stamp onto but I think it really is worth the effort. I separated (I covered the half I didn't want to stamp with some scotch tape, applied ink, then removed the tape and stamped) the sentiment and stamped it onto two lines.

I used scraps to create this cute little pocket on the inside of the card.  Like the front, I added some gel pen stitching around the brown mat.

post signature

Tuesday, July 26, 2011

You're Stinkin' Cute Card

 
I LOVE Create a Critter!! This would have to be one of my favorite cards I've creating using CAC. 
The card base is welded on my Gypsy.  I sized it to 4 1/4"x5 1/2".  I cut the skunk at 2 3/4", the stump measures 1 1/2" and the blue layer measures 3 1/4 x 4 1/2. I added a black layer behind the blue sky layer measuring just 1/8" larger.

I inked the blue layer with royal blue ink and a finger dauber.  The skunk's eyes are black flat back pearls and I added many layers of Glossy Accents to the nose to give it the wonderful shine and dimension. The sentiment is a mix of two different My Pink Stamper stamps from her Punny-licious set.

I inked the stump with black ink and the grass with forest green ink. The grass layer is from Plantin Schoolbook but at 1" and 3/4".

Can you see all the dimension here?? I attached the first layer of grass down, then added the stump with a layer of 1/8" pop dots. I then attached the second layer of grass on top. The skunk is placed on top of the stump with 1/4" pop dots. I love all the dimension!! The last thing I added was the black gel pen stitches around the postage stamp shaped card base.

post signature

Tuesday, July 19, 2011

Ford Truck Easel Card

No Cricut on my card today, but I had a fun time making this custom order card.
The sunset and road sign images are from a Google image search, but I had a custom order come in for a birthday card for a guy that is nearing retirement.  The customer wanted a Ford truck from 1949 (the birth year of the recipient) and a road sign for the birthday sentiment.  The sunset is to represent leaving the work force and entering retirement.  This is the card I came up with.

I printed the images onto Glossy photo paper and matted it with a black frame.  I then, printed out a second image and hand cut the truck and road sign and added them to the completed card front with pop dots.  It really give the card some wonderful dimension.  I ran the silver metallic paper through the Diamond Plate embossing folder and set some screw head brads (from Recollections) on the four corners of the card layer and on the bottom two corners on the easel support.

The inside of the card is finished off with some more metallic paper and a second sunset layer - this time I turned the opacity down to 70% using Photoshop so it can be used for the message spot.

The silver metallic paper sure adds wonderful shine to the card. The frame around the card front reminds me of those Diamond Plate licence plate frames. The font on the road sign are "license plate." On the truck, I personalized the license plate to say the recipient's name using "Ford Script." 

Here is the image if you'd like to make one of these cards too.  I took off the personalized licence plate and changed it to read the truck's year.  The road sign now says "happy birthday" only.  Feel free to click on the photo to save it to your computer. I love how it looks with the truck and road sign up on pop dots, but feel free to complete your card however you'd like.

Here is just the sunset layer.  I love this image.  

post signature

Wednesday, May 18, 2011

Alligator shape card

I have this super fun shaped card to share today!! :) One of my adorable neighbor boys will be celebrating his seventh birthday at the end of the week so I had to make a good "boy card." With two boys of my own, you'd think I'd have no problem with this!

I used my Gypsy and Create a Critter to weld this altered shape card together.  I sized the shadow layer first to RDS of 3 1/2" x 6" to fit these random envelopes I have.  Then I had to size all the other layers to fit the shadow (because I used RDS it made it a little difficult).  The layers ended up being 5.95" x 3.35".

After I assembled the alligator, I added a little doodling -- less is more for boy's cards. 

I threw on some black flat back self-adhesive pearls for the eyes and nostrils. Here you can see how I made the card so he can stand up to wish the special boy "happy birthday." (Hero Arts, Big Hugs clear stamp set)

Challenge:
post signature

Friday, May 13, 2011

Flip Flops Birthday Card

Hey guys! I have a fun card to share with you today.
 Here in the Great Northwest, we are wishing Spring would arrive... we've had one of the wettest and coldest spring weather on record. :(
The summer words background paper is from DCWVs summer stack.

Here is the Scrappy Mom's Stamp I used for the front of the card.  I love the little pink buttons too. Of course I used my white Gelly Roll gel pen to add all the doodling around the flip flops and the case base.

The flip flops are a free svg file I found awhile back. I thought they looked so cute cut in the pink flower paper.  I added some Glossy accents and Star Dust Stickles to the straps. It really gives them excellent dimension. I attached the flip flops to the card base with pop-dots.

Can you see how much they stand out?

The inside of the card got one more Scrappy Mom's Stamp and a white mat. I chose to cut the card base out of craft card stock.  It really reminded me of the sandy Oregon Beaches around here.

The card base and all the layers were cut from Tie the Knot.  

Challenges:
post signature

Tuesday, May 3, 2011

Manly Billiards Card

Michelle over at Queen of my Craftroom is hosting a Manly Card Swap, it's not due until the end of May but I misunderstood this as a challenge (instead of a swap) and got it completed... THEN I read it was a swap so I'll have to make nine more of them!!  Here is what I came up with.

I think this is a wonderful card for a manly card... and what's more manly than Father's Day. I know I am early, but I prefer "well prepared" over "running late".

This is a simple A2 card.  I printed the pictures onto glossy photo paper so that the reflections stand out. I added the sentiment on the computer using 20 point "hand tooled" font. Three little brads along the right side finish off the front of the card. I find Manly cards are better the less doodling I do! :)

The inside matches the front.  I printed both images on one 4" x 6" piece of photo paper and then just cut them apart and matted them to attach to the card.

Here is the blank picture for you to download.  Just click on the picture to see the full sized image. Then right-click and select "save image as..." to save it to your computer.

Here is the image with the "happy father's day" sentiment.

Here is the same image with a "Happy Birthday!" sentiment.


The swap cards will all be Manly "Happy Birthday" cards (not Father's day).

Enjoy!! If you end of using these images for your project, I'd love to see your take on the same images! :)
post signature

Wednesday, April 20, 2011

My First Scrapbook Page

If you haven't yet, please take a second to enter my 400 follower giveaway!

If you are a regular visitor of my blog, you know I love making cards, crafting with my kiddos and making 3-D projects too.  However, I am not a scrapbooker!!  Michelle over at Queen of my Craftroom assigned her design team to make an Easter Scrapbook page.... well, that certainly was a challenge for me!

I used my nephew as inspiration for this scrapbook page. He is six months old and celebrating his first Easter.  So, I grabbed this picture from my sister and using the colors in the photo, I went to work!

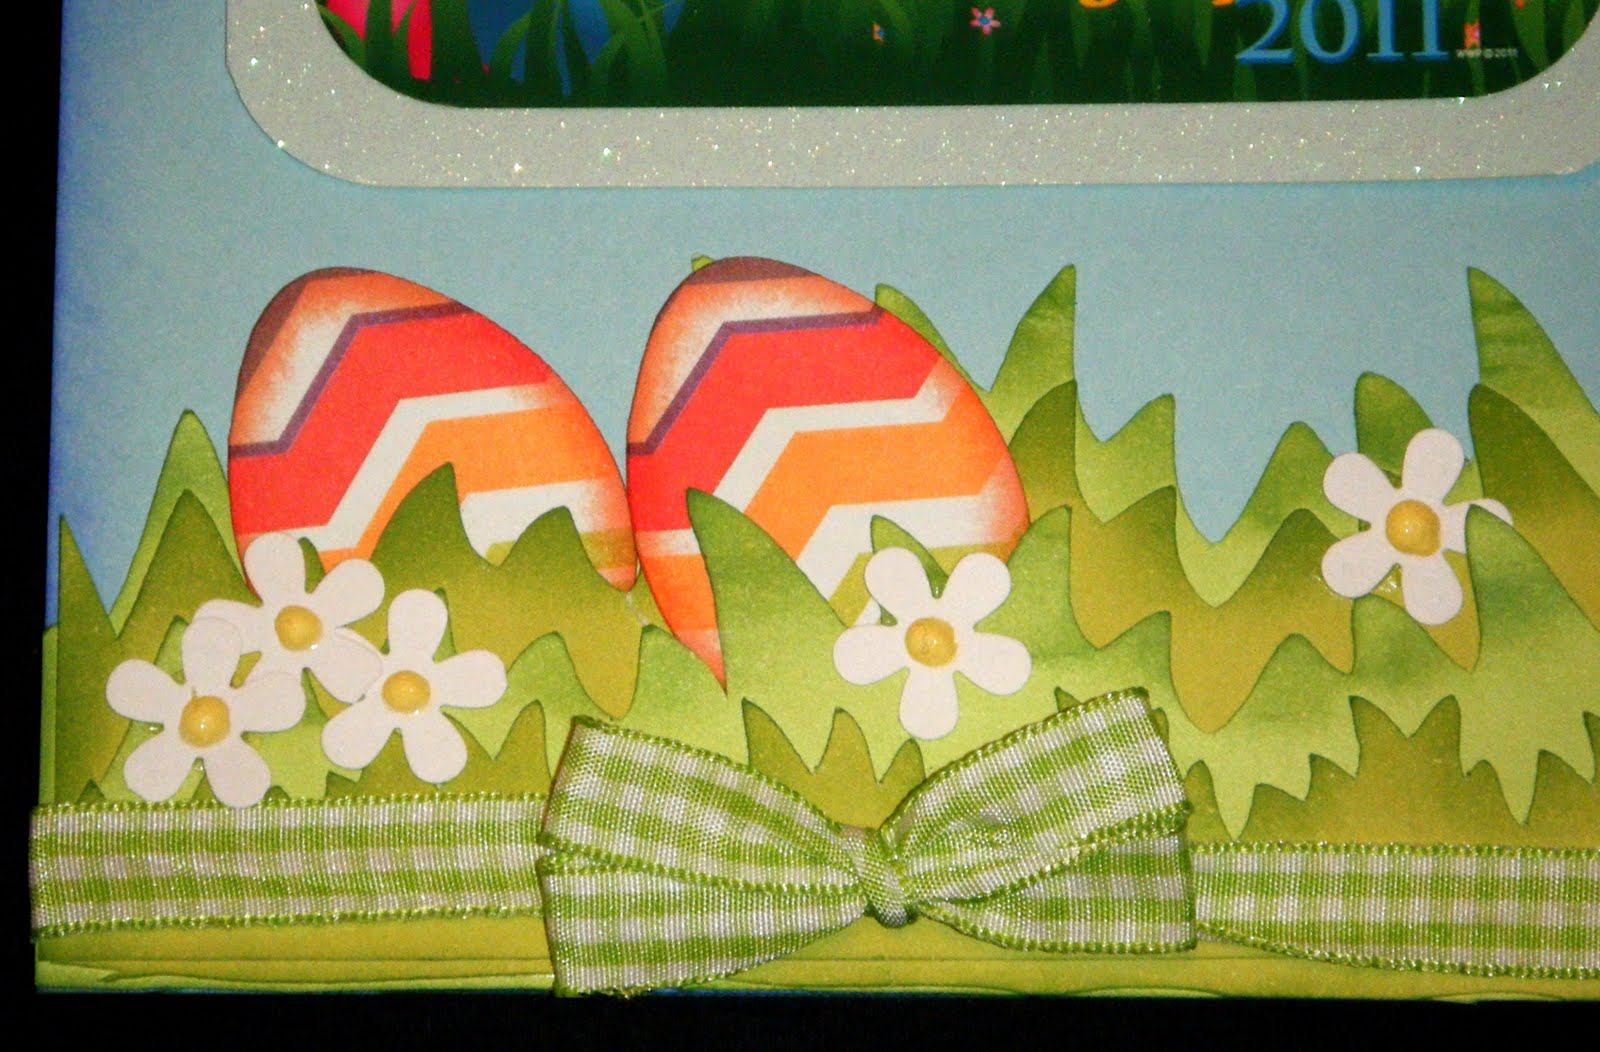
I cut four layers of grass from Everyday Paper Dolls and six eggs from Doodlecharms (1 1/2"). I love this green and white gingham ribbon. The little flowers are a punch by EK Success. I used light yellow dimensional paint for the flower centers. I inked the grass with green and the eggs with orange ink.

The clouds and sun are from Create a Critter. I inked the sun with orange ink and all the clouds with blue.  The title is printed using Floral font. Some clouds are attached straight to the page while some are mounted on thin pop-dots and the title cloud is up on thick pop-dots.

I added two additional mats so my sister can add a couple more pics.  These are 3 1/2" x 4 1/2" using light green DCWV  glitter paper while the picture of Connor with the Easter bunny is on light blue DCWV glitter paper. All photo mats have the corners rounded.

I used my Bow Easy to make this double looped bow.  I love the Bow Easy so much, I'll be adding one to my 400 follower giveaway goody bag!!

I had to add a little Easter bunny to the scene.  This bunny one is cut from Celebrate with Flourish at 2" on the black out feature.

I'll also be adding this to the challenge over at More Than Favors:
and

Please let me know what you think... being my very first scrapbook layout, I am very nervous about presenting it to all you wonderful and talented crafters that visit me here on my blog! I know many of you are seasoned scrapbookers! :)


post signature