Showing posts with label Jitterbuggin' Challenge. Show all posts

Tuesday, March 29, 2011

Pink Converse Shoe Card

If you haven't yet, please take a second to enter my 400 follower giveaway!


I have shared a similar card with you in the past, but here is a pink version of my Classic Converse Card I made awhile back.
I used the Paisley Cartridge to make this shoe shaped card.  I used my Gypsy to weld the shape and hide the extra pieces I wan't planning on using. I love this pink flowery paper I cut for the shoe, it's an older paper I grabbed from my scraps so I don't have the name for you! :(

The shadow of the shoe is cut with purple glitter paper from a DCWV stack. I added sheer ribbon and eyelets for the laces on the shoe.  I also remembered to add eyelets for the vents in the shoe (which I forgot last time).

I hand drew all the stitching on this shoe... lots of work but I think it's worth it! 

Here is the black on the sole, I had to add this by hand.

Here is my take on the classic Converse star, I used more of the purple glitter paper and added some glittery purple gel pen stitches too.

Challenges:

post signature

Sunday, March 13, 2011

Panoramic Beach Card


Here is a wonderful card I made using a photo I took in January of 2010.  We live in SW Washington and it's a little drive to the Oregon Coast, but it's beautiful there and we try to make the 2 hour drive there a couple of times a year.  One day in early January when the storms make the beach absolutely wonderful, we packed the family up for a day trip.

Here is a close-up of my photo
I made this card large to accommodate the panoramic style I cropped this photo to. The card base measures 4" x 9" and it's also an easel card. I cut the card base from white card stock, but matted the photo on black and then on an embossed stripe and then on Bazzill shimmer blue card stock.


Here you can see the three black eyelets I added to the right side of the card as well as some of the white stitching.  I hand drew the faux stitching using my white Gelly-roll gel pen on the black and blue mats.


This is just the little tab I printed the date on. I ran a scrap of the bazzill card stock threw my printer.  With all the texture in the card stock, the ink didn't show up great but I like the more subtle look and decided to use it anyway.


Here you can see the card when opened up into the easel.  As you can tell, it can stand on it's own.  I LOVE making easel cards! :)

Side view of the easel card.

The only Cricut cuts on here are the sentiment blocks and the mats.  I wanted to make sure the rectangles are STRAIGHT so I used Plantin Schoolbook for the black border mats,  striped mats and the bazzill blue mats.  Simple rectangles, but I can really tell if I cut them off kilter!! :(

I am entering this card into the following challenge:
post signature

Thursday, March 3, 2011

When Pigs Fly...

I have an adorable card to share with you today (at least I think it's adorable). :)


I made this cute piggy card for the "Go Hog Wild" challenge

The card base it cut from the Preserves cart (it's just a tag so most any tag could work).  I sized the card base to 5 1/2" x 4 1/4", copied and welded the two to form the card. I coped the shape two more times to make the red and wood plank mats (red @ 4" x 5 1/4" and wood @ 3 3/4" x 5").

The pig is from Just Because Cards cut @ 2 1/2".

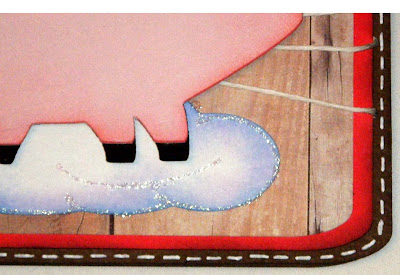
The pig's wings are from Indie Art, also cut @ 2 1/2". The cloud is also from Indie Art, but I sized it down to 3.66" x 2.18" on my Gypsy. I cut the top layer of the wings with DCWV glitter paper.

I added stickles to the cloud and the pig's ears and snout to match the wings.


I glued a pair of stacked buttons on the bottom left side of the card. I got these from Michael's dollar bin and the white twine from Dollar Tree.

 I inked all the edges!! :) Pink ink around the pig's body and the wings, blue and purple ink around the cloud and black ink around the card body inside and out.  

I couldn't resist adding the white Gelly Roll pen stitches around the brown card base on the front and back.  I think it complements the rustic farm theme of the card as well as the white twine I added to the front.

The pig is applied with pop-dots... the second set of wings is up on an additional layer of pop-dots too.

I didn't add any sentiment this time.  I think it would be great for a congrats card ... you know, "It'll happen when pigs fly!!"


post signature

Tuesday, February 22, 2011

Converse Card


Paula and Meriah are at it again with another wonderful Cricut Cartridge Chaos Challenge (CCCC).  This week the pick is Paisley!! I am so excited 'cause I just recently got this cart... so I got on the challenge right away! :)

I don't know what my deal is right now,
but I've been rockin' the shape cards... A LOT! :)

I made the very girly shoe from Paisley
into a black high top old-school Converse shoe!!


All the cuts were from Paisley (including the circle and the stars). I used the new "Dots, Stripes and Plaids" mat stack from DCWV for the back ground paper... I think it adds some needed color to the card.

I drew in all the little stitch lines with my white gelly roll pen. 
The black stitches are a fine tip sharpie.

Here are the laces
(okay, they are little strips of white velvet ribbon threaded through eyelets).

All the solid card stock is generic stuff from Joanns.

What??? No pop-dots on this project!!  What was I thinking?? :)

I found the perfect challenge for this card:


post signature