Showing posts with label Celebrate the Occasion. Show all posts

Tuesday, April 17, 2012

Garden Birthday card

Today marks the start of another challenge over at Die Cuttin' Divas.
This week the challenge is:
Garden theme

Today, my card features a 3" wheelbarrow from Walk in my Garden, clouds from Serenade, grass from Everyday Paper Dolls and the sun from Celebrate the Occasion! The card base, sun and sentiment banner are all made from handmade wildflower embedded seed paper!! All those layers can be planted to grow a wonderful garden of wildflowers!

I inked all the layers with a sponge and coordinating ink colors. I hand cut the little banner and stamped it with a Scrappy Mom's Stamp. I used Momento black ink... if you are stamping on textured paper like this, it's a great idea to test the ink on a scrap of the paper before you put it on your project.

The center of the little flowers are finished off with some Liquid Pearls in light yellow.

All the layers and embellishments are added with pop dots. I wanted to make sure they can be easily removed so the card base can be planted.

We'd love for you to stop by Die Cuttin' Divas and enter the color challenge!
Garden theme

The sponsor this week is The Greeting Farm

Friday, July 29, 2011

Salt and Pepper Card

This fun card is from From My Kitchen. I love the shape of the card... it's a recipe card! The card measures 4 1/4" x 5 1/2" and will fit in a standard A2 envelope.

The salt and pepper shakers are cut at 3".  I inked around all the blue layers with royal blue ink.

I attached the pepper shaker with 1/8" pop dots and the salt shaker with 1/4" pop dots.  I just LOVE the dimension!! I drew the holes on the top of the shakers with my white gel pen. I added these flat back self adhesive pearls in sets of three (I buy mine at Craft Warehouse).

I printed this sentiment using Hobby font at 23 points. My EK Success Photo Label punch was perfect for this card.  I hand cut the blue layer to mat.  This blue textured card stock is from my scraps, but I know it's Bazzill.  I added some white gel pen stitches on these blue layers only.

Here you can see how the gel pen stitches match the white stitching on the blue ribbon.  I found this ribbon on clearance for 50 cents at Walmart. The polka dot back ground paper is from Heidi Grace.

Instead of having a card base that opens to the side (which would be easier with this card shape)  I made this card open from the top so it can be displayed.  My card base measures 5 1/2" x 7 1/2" and folds in the center.

post signature

Monday, July 18, 2011

Penguin shaped card

This cute little penguin is from Simply Charmed.  I've never cut him before today, but he's so cute, I'm sure he'll use them again. Using the shadow layer (sized to 4 1/4" wide) I created a shaped card.

I welded the shape at the top so the penguin can stand up... oh-so-cute! I added some pop dots under the two sides of the bow tie.  Some quick doodling with a white gel pen is always fun for me.

I used flat back self-adhesive pearls for the eyes! :)

The sentiment stamp is from Studio G.  My favorite craft store, Craft Warehouse, was having a sidewalk sale this last week and had TONS of Studio G Stamps on super sale.... when I say super sale I mean it!!! They were all priced at 10 for a $1.00!!

Challenges:
post signature

Saturday, July 9, 2011

Christmas in July

Are you ready for Christmas.... in July, that is! :)
 Here is my very first Christmas card for the year! It's a winter scene card with a pickup taking home a beautiful Christmas tree! I cut the pickup from Just Because Cards at 5" (all layers including the shadow) using the flip feature.  The truck is completed with silver mirror paper for the hub caps, door handle and fenders. Then I cut the Christmas tree at 3" from Doodlecharms (including the shadow layer). 


I added glitter to the truck top and the tree to represent a fresh winter snowfall.  Then I added the "Christmas is on its way!" embossed in black.  The stamp is a couple years old so I don't know if you can still get it or not, but it's from Inkadinkado # 97734 - Warm Holiday Wishes.

And lastly, I added some white "stitching" using my Gelly Roll pen. 


post signature

Sunday, July 3, 2011

"Feel Better!" Star card

The card I am sharing today was made for a very special little boy. Over at Whimsical Wednesday, the challenge this week is to make a card for a 15-month-old named Angelo and his family. Angelo recently had surgery to remove a brain tumor and will be starting chemotherapy very soon.
The blue and red stars paper is from DCWV's All About Boys set. I matted it with black and then layered it onto a white card stock base after I rounded all the corners with my Corner Chomper.

The three layers of the star are from Simply Charmed (cut at 3", 3 1/4" and 3 1/2"). My six year old said this little star needed a band-aid so he added that.  I punched out little "kissy lips" and glued that to the band-aid and added some Stickles. I added some white gel pen stitches and attached the star with an Action Wobble. This face is from Peachy Keen Stamps in their "Everyday Face Assortment" but it's the largest face in the set.

The "Feel Better!" stamp is from Scrappy Moms Stamps : Simple Sentiments.  I added some light blue 1/8" satin ribbon to the card layer before attaching it to the card base. The black card layer also got some gel pen doodling.

On the inside of the card is another Scrappy Moms Stamp from the Everyday Greetings. I used some scraps from the front card layers to finish off the inside of the card.

If you have the time to enter any challenges, please fit this into your schedule.  Visit Whimsical Wednesday and find out more about little Angelo and his special get well wishes card drive.

Challenges : 
post signature

Tuesday, June 21, 2011

Summer Scene Card

I love making shaped cards (as you'll know if you are regular visitor) but I like to look beyond the usual shapes for my inspiration. This card, believe it or not, is created by re-sizing a tag shape.
I love summer!! This would be a wonderful birthday card for someone special, but this one is going to a blogger who recently sent me some blog candy I won. :)

My little sentiment tag is hand cut to about 3/4" x 2". The stamp is from Scrappy Mom's Stamps. I mounted the tag up on pop dots and tucked the end under the tree just a little. I finished off the tag with some white gel pen stitches.

The sun is from Celebrate with Flourish, cut at 1 3/4". I added Glossy Accents to the center (it's still wet in the picture). The clouds are from Serenade, cut at 1" and 1 1/4". Both layers of the sun were inked with orange ink, on the clouds I used blue ink.

This tree is from Simply Charmed, all layers cut at 3 1/4". The grass is from Paper Doll Dress up cut at 1" and 3/4". The little bird is from Serenade, cut at 3/4".  I also used green and clear Glaze pens to add the details on the tree. I inked the tree and grass with green ink and the sky layer was detailed with the same blue ink I used on the clouds.

I hand drew the little daises with my white gel pen and added the centers with a yellow Glaze pen.

Here you can see the full card base.  I used Tags, Bags, Boxes and More cart.  This tag is from page 91 (button #10) using the mirror creative feature. I sized the base to 4 1/4" x 11". The front layers were sized down by 1/4" each. The black layer measures 4" x 5 1/4" and the blue sky layer measures 3 3/4" x 5".

Challenges:
Craft Junkie Too Friend


post signature

Wednesday, June 15, 2011

Have a Crab-u-lous Birthday!

 I know that not everyone has easy access to the beach, but I am just an hour away from the Oregon or Washington Coast line.  So when I think of summer, it usually involves at least one trip to the beach!

Here is my take on a summer themed birthday card. I have many birthdays coming up this summer so you'll some more coming soon!

Yep, another shaped card.  I always get the best reactions from kids when they open a fun shaped card!  This sandcastle is from Create a Critter. I welded two shadow layers together to form this portrait A2 card. All layers are cut at roughly 4 1/4" x 5 1/2".
The sentiment is a mix of two My Pink Stamper Stamps from her Punny-licious stamps.  I combined the "Have a" from one stamp and the "Crab-u-lous" from another stamp.  The "B-day!" is a Studio G Stamp. I punched the sentiment out with an EK Success Photo Label punch and matted it in some scraps from the rest of the card. I love these little rhinestones too, I added a few around the card.
Here is my cutie crab. He is also from Create a Critter, I added a Peachy Keen stamp face (and added gel pen doodles).  He was cut at 2" and attached with pop dots. His hat was cut at 3/4" from the Celebrations cart.
All the paper is from DCWV mixed stack 7. I added lots of white gel pen accents. In this picture you can see how I welded the card base at the top.  I think the card would be stronger if I'd have welded it at the side of the castle (live and learn, huh).

Challenge:
Craft Junkie Too Friend


post signature

Saturday, June 4, 2011

Apples for the teacher

I don't know about everywhere, but school hasn't quite ended here.  The last day of school for my boys is June 16th and I thought I'd share this project for all of you last minute crafters out there.

Todays project is an apple basket card set. All six of the apples are shaped cards with white card bases. What a perfect gift to give your favorite teacher, right??

Step one is cutting a bowl for all the fruit to sit in. I used the Paper Doll Dress Up cartridge to cut a bowl using vellum. Using the Fit to Page feature, cut the Pioneer Girl on Accessory 2 (the bowl will cut between 30"-33"), or RDS or 11 3/4" on the Gypsy

If you have a Gypsy, just hide the contours and cut a second bowl out of white card stock (or whatever color you'd like your bowl to be).
 If you don't have a Gypsy I've written some alternative directions:
You'll have to glue the vellum bowl down onto white card stock. Using a glue runner, glue only the top rim (above the lip cut), around the edges, and the bottom of the bowl. Attach it to the card stock and hand cut the bowl backing.

Step two is cutting the apple from Preserves cartridge. I used apple 4. Cut all layers at 4 3/4".

Again, if you have a Gypsy the directions are easier (just weld the card base to be a apple shaped card). If you don't have a Gypsy, cut two base layers and attach them together at the stem/leaf with some glue runner. 
Put all your apples together and add doodle dots, etc.  I have to make two bowls of apples so I keep the doodling to a minimum! :)

I cut six apple cards to get a nice full bowl of apples.


Here is a picture of the apples all piled in the bowl.
See how they peek out of the vellum bowl?


I added a pocket to the back of my bowl to hold all the envelopes for the apple cards.  These are sized to fit an A2 envelope just fine. I think these would make a wonderful gift for the end of the year gift (like we are doing) or teacher appreciation, first day of school etc.

Challenges:


post signature

Thursday, April 14, 2011

Easter Basket


If you haven't yet, please take a second to enter my 400 follower giveaway!

I have a cute little Easter Basket to share today!! I actually used Sweet Treats to make this 6"x6" basket. It required only one cut on my Cricut, one border punch and one sentiment block punch.
I used the very first image from the Sweet Treats cartridge, using the cupcake wrapper function key. I cut it at 11 1/2" (as large as I could on the 12" x 12" Cricut mat). I added the bunny from Give a Hoot (cut at 2 1/2"). I also cut a 11 1/2" x 1 1/4" strip of paper for the handle and two 3 3/4" x 3 3/4" pieces to reinforce the bottom of the basket as well as two 3 1/2" x 1 1/4" pieces to reinforce the handles.

Here is the Gypsy file for the project if you'd like to make your own:
Bunny_cupcake_box.gypsy on 4 Shared

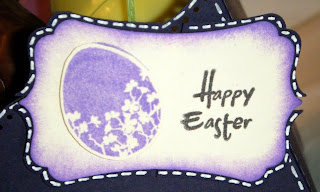
I used an EK Success punch for the top edge of the basket and the handle.  The punch is called "Dotted Wave." I also used another EK Success punch for the label (Journal Plate). The sentiment is from Close to my Heart, and the stamped egg is a Studio G stamp. I added three little purple buttons tied with white twine.

I went totally crazy with the Gelly Roll white gel pen!! :)  I really love the white pen on the dark colors! I used my MS scoreboard to score the basket, then I added the gel pen stitches before I assembled the basket.

For the little bunny window, I glued a piece of acetate (actually I used the plastic packaging that the Cricut Cartridges come in) to the inside of the basket. Then I used Sticky Strip to assemble the box.

After I reinforced the handle, I attached them with a little purple brad. Here you can see how I used the Dotted Wave border punch to decorate the handle of the basket too.

I popped the Easter egg up on Pop Dots. I punched the tag twice, once in white and once in purple. I cut the purple into quadrants so I could arrange them like a shadow on the sentiment tag. I inked the tag in Rio Purple with my finger dauber.

Ha ha, look at that yummy  adorable chocolate bunny peeking out of the basket!
I added some clear nail polish to the knots on my little twine bows.  I find that my twine loosens a bit so I drop some nail polish to hold it nice and tight.

There is lots of room for treats in this mini basket.  If you choose not to add Easter grass you could even decorate the bottom of your basket.

Just in case you missed it, here is the Gypsy file for this project:

You can easily re-purpose this project for a gift bag,  treat bag or packaging for handmade cards, etc.

Challenges:
post signature