Showing posts with label Cooking with Cricut. Show all posts

Friday, August 26, 2011

You're a Peach card set

I love a good set of note cards, how about you? I love that they are small, a quick note will fill the inside and it can be dropped into a gift, an order etc.  And these note cards are no exception.
These little note cards measure 3 1/2" x 3 1/2" All the pieces are from my scrap bin. The little peach is from Just Because Cards - cut at 2 1/4".  I inked around the edges of the peach and the card base.

I covered the leaves with Studio G Glitter Glue (clear) and added this adorable Peachy Keen face from the Wide Eyed Kids set ( 1 1/8" face) and gel pen accents with some pink chalk for the cheeks.

Each note card has the same sentiment inside - printed using Expose font at 36 points. Again, I inked around the card base with orange ink and a finger dauber.

Here is my adorable card set. I made a total of eight of these super cute cards.

Challenge:

Thursday, July 28, 2011

Hoppy Birthday Card

Today I made this adorable rabbit card.  I love the shape of the card, but it's all the little details that make this card even more special.
The bunny and all his layers are from Nate's ABCs. I sized them to 4" but I added a second layer of grass (from EDPD) to give it some more height.  The little bunny doesn't come with any details, so I found shapes on Nate's ABCs that I could use for his nose and ears.  The little cotton tail is Q-tip cotton I attached with a little hot glue. The card shape is from Preserves, it's actually a tag I sized to fit an A2 envelope. 

The senitment is from My Pink Stamper's Punny-licious.  I inked all the grass layers with green ink and a finger dauber.  I attached the bunny with pop-dots and the grass with thicker pop dots.

The eye and these black pearls are self-stick flat back peals I grabbed from Craft Warehouse.  Here you can see I also inked around the background paper.  Using black ink and a finger dauber gives the wood grain paper a wonderful distress look.  The background paper is from DCWV's Green Stack.  I used a mat stack, but I also have it in an 8" x 8" stack.

Like most scene-style cards, I like to make the card open from the top so it can be displayed.  For this card, I couldn't make the card open from the top and preserve the tag top shape. My card base measures 5 1/2" x 7 3/4" and folds in the center.

Challenges :  
post signature

Wednesday, June 29, 2011

Have an Udderly Amazing Day!

I pulled out the My Pink Stamper Punny-licious stamps today. Here is the cute card I came up with! :)
The cow is cut from From my Kitchen at 2 3/4", the cow bell and collar are from Just Because Cards (the sheep button) cut at 7".  I mounted her up on pop dots. 

The sentiment is from two different stamps from My Pink Stampers Punny-licious set.

I doodled all around the card (including ON the cow).  The border punch is called Effervesce by Fiskars. I also added two lengths of 1/8" red gros grain ribbon... I wanted a thicker band of ribbon but didn't have thicker red ribbon.

I added a little more patterned paper (from DCWV, Stack 7).  I love this plaid paper, it reminds me of a picnic table! :) I hope you like this card as much as I do.  

If you have any questions, feel free to leave them in a comment or use the "Need to Contact me?" tab at the top of my blog.

post signature

Tuesday, June 28, 2011

Watermelon Summer Reading Log

I had time to sneak one more project in... my son and I created this summer reading log featuring the watermelon from Doodle Charms.
I cut the watermelon from Doodlecharms at 4". My son helped design and assemble his reading log.  He chose paper from my scrap bin - the red black and shimmery green watermelon rind are all scraps.  The yellow stars background paper is unmarked but came from the loose paper racks at Joanns.

Here you can see the green watermelon rind, it's shimmery green and that doesn't photograph too well but it looks terrific in person.  We added some Glossy Accents to the seeds and I added the white gel pen stitches. The watermelon is attached with two Action Wobbles and it looks so cute! :)

We added some red and white bakers twine and a red button too. You can see the stars on the background paper here.  My son told me he wanted yellow paper with stars and I found this paper for him in my stash! Just perfect.

We printed the title directly on the yellow star layer.  Bryce picked Kristen ITC font (30 points).  I added a green outline to the black letters and Bryce really wanted a shadow layer so we added that too.

Here is the inside of the reading log.  I've included a PDF file so you can download it for free and make your own (or create one with your child). I used a saddle stapler to bind Bryce's reading log, but you can lace it, use a Bind-it-all, Cinch binder etc.

Here's a close up of the reading log pages.  You can see I just used some 20 lb printer paper for our pages (you can see the backside bleeding through a little) but you could used heavier paper if you wish.  

Download this PDF to make your own summer reading log:
Challenges:
post signature

Thursday, March 3, 2011

When Pigs Fly...

I have an adorable card to share with you today (at least I think it's adorable). :)


I made this cute piggy card for the "Go Hog Wild" challenge

The card base it cut from the Preserves cart (it's just a tag so most any tag could work).  I sized the card base to 5 1/2" x 4 1/4", copied and welded the two to form the card. I coped the shape two more times to make the red and wood plank mats (red @ 4" x 5 1/4" and wood @ 3 3/4" x 5").

The pig is from Just Because Cards cut @ 2 1/2".

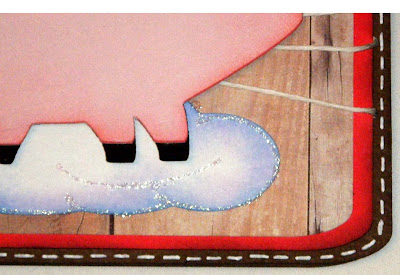
The pig's wings are from Indie Art, also cut @ 2 1/2". The cloud is also from Indie Art, but I sized it down to 3.66" x 2.18" on my Gypsy. I cut the top layer of the wings with DCWV glitter paper.

I added stickles to the cloud and the pig's ears and snout to match the wings.


I glued a pair of stacked buttons on the bottom left side of the card. I got these from Michael's dollar bin and the white twine from Dollar Tree.

 I inked all the edges!! :) Pink ink around the pig's body and the wings, blue and purple ink around the cloud and black ink around the card body inside and out.  

I couldn't resist adding the white Gelly Roll pen stitches around the brown card base on the front and back.  I think it complements the rustic farm theme of the card as well as the white twine I added to the front.

The pig is applied with pop-dots... the second set of wings is up on an additional layer of pop-dots too.

I didn't add any sentiment this time.  I think it would be great for a congrats card ... you know, "It'll happen when pigs fly!!"


post signature