Showing posts with label Throwback Thursday. Show all posts

Wednesday, September 7, 2011

Simple Halloween Card

I made this super simple cricut-less card today. I've been having a little sag in my mojo so it was good to start simple.  This card features paper and stamps from Studio G. I found $1 packs of paper and stamps at Walmart. :) The border punch is a Fiskars punch called Threading Water.

I paper pieced these little pumpkins... how cute are they!  I punched the pumpkin out with a 1" punch and used a 1 1/2" punch (in black) to frame the white circle.

This is a simple easel card. The sentiment stamps is from Close to My Heart - Everyday Occasions set.

I inked all the orange pieces with "pumpkin" orange ink and all the purple layers with "rio" purple.

It's kind of a shallow easel card, but I love the simplicity of the repetition and those cute little pumpkins.

Challenges:

Friday, August 12, 2011

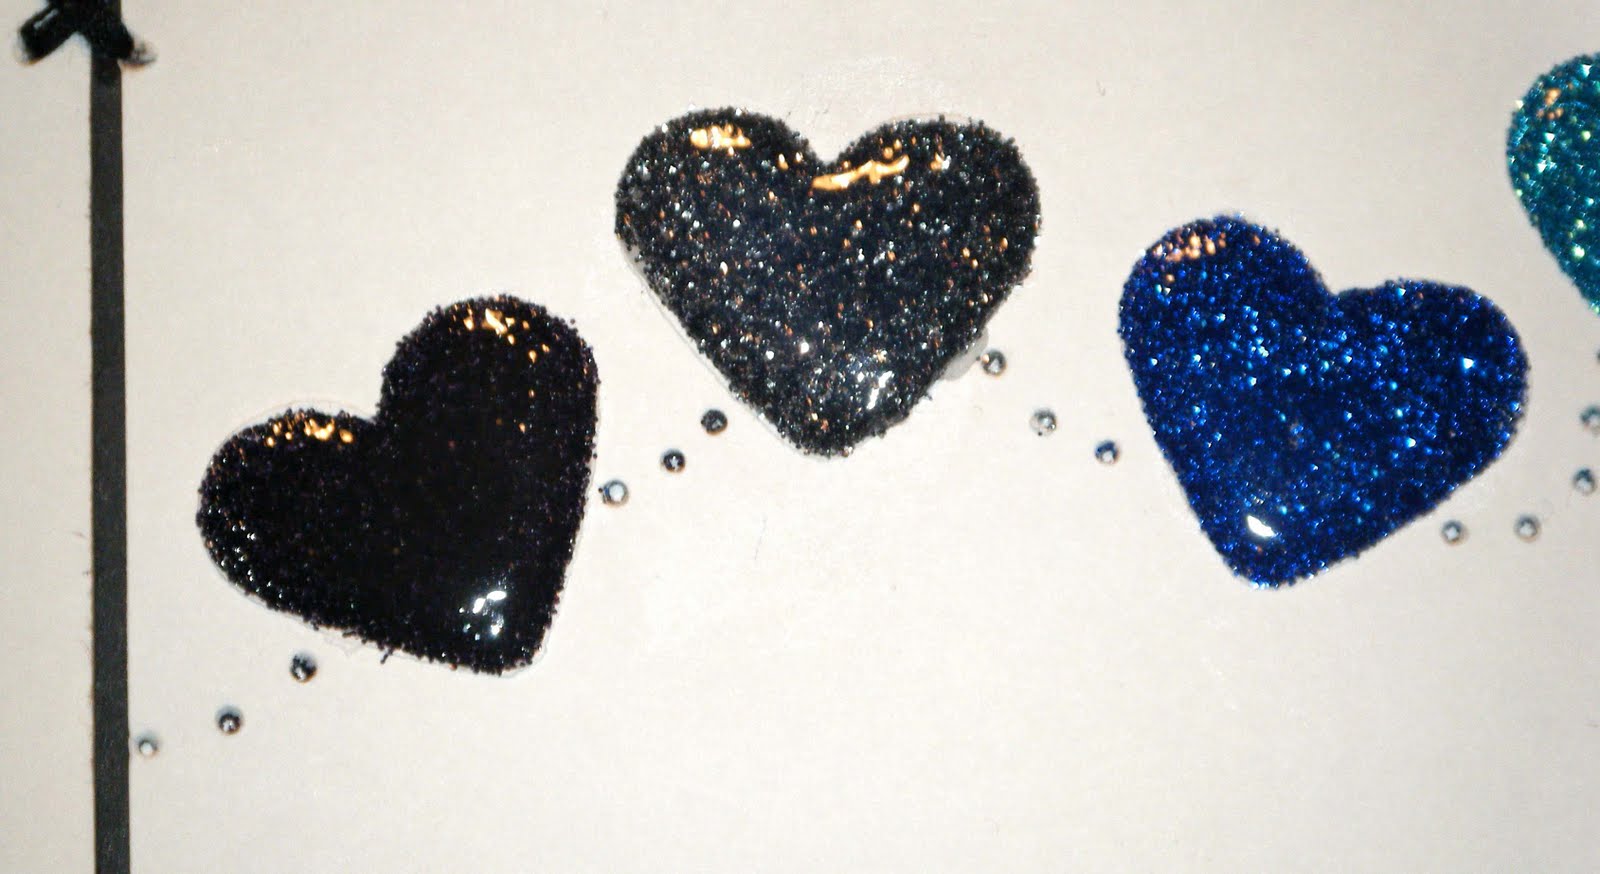
CAS hearts thank you card


I love this super simpe card I made today.  It really only has a few elements, but the clean and simple concept sure is hard for me!  This card measure 4 1/4" x 5 1/2", the black mat it 3 3/4" x 5" and the white mat is an 1/8" smaller all around.  That's all the layers...


These little hearts were cut from Fabulous Finds (retired cart) at 3/4" in white.  Then I attached them to the white layer with quick dry glue, stamped the sentiment and went to work.  I used a paper piercer to poke the little heart trails and a few holes in between the two stamped sentiments. I also poked the holes for the little "x"s that I used to attach the black and white mat to the white card base.


Then I applied Glossy Accents to one heart at a time, then sprinkled fine glitter over each heart.  I used the little packs of four colors that Michaels carried last Christmas. After the GA dried, I added a second layer to seal the glitter into the heart... making for a wonderful dimensional element. 


I used just a little ATG glue to secure the black and white mat to the card base and hand stitched the "x"s.  Some of them are a little rough looking, not perfect etc... but it's homemade... it won't be perfect every time.


I love this sentiement.  It has this wonderful curve I tried to mimic with the hearts.  I have no idea who made the stamp, I found it with out packaging in Joann's as-is department... a 15 piece stamp set for 75 cents.


I kept the inside very simple too... just adding a second stamp from the set. 

Saturday, July 9, 2011

Christmas in July

Are you ready for Christmas.... in July, that is! :)
 Here is my very first Christmas card for the year! It's a winter scene card with a pickup taking home a beautiful Christmas tree! I cut the pickup from Just Because Cards at 5" (all layers including the shadow) using the flip feature.  The truck is completed with silver mirror paper for the hub caps, door handle and fenders. Then I cut the Christmas tree at 3" from Doodlecharms (including the shadow layer). 


I added glitter to the truck top and the tree to represent a fresh winter snowfall.  Then I added the "Christmas is on its way!" embossed in black.  The stamp is a couple years old so I don't know if you can still get it or not, but it's from Inkadinkado # 97734 - Warm Holiday Wishes.

And lastly, I added some white "stitching" using my Gelly Roll pen. 


post signature

Wednesday, June 8, 2011

Mountain Scene Card

Hi everyone! I have a fun card to share with you today.  One of my favorite things about this card is that there are surprise moving pieces on the front. 

Here is the card front.  It's all put together here, it may look kinda ordinary, but there is a wonderful secret.

When you fold out the tree, you can see more of the mountain scene revealed. I cut the tree and all it's parts from Simply Charmed at 3 3/4".  Something special is how I made this card.  The tree is welded to the blue layer so that it all cuts together, making the piecing fairly easy.

Second, the picket fence folds out too.  Again, I welded the fence (from PDDU, cut at 1 1/4" two fences welded together) to the black mat. I cut the white fence and when pieced it makes a nice strong fold out layer.

This is the grass, fir trees and mountains from Paper Doll Dress up.  The mountains are cut at 5 3/4" wide, I cut a second layer to get the snow caps. The mountains are cut using gray shimmer paper (they look more subtle in person). The fir trees measure between 1/2" and 1". The grass layers are measured to 5 3/4" also. The little flowers are from Simply Charmed (with yellow liquid pearls centers) and the clouds are from CAC.  I added some inking around all layers and gel pen stitches around the black layer. Stardust Stickles adds the sparkle you see all over the card.

I added some matching blue and black mats to the inside. I added a Hero Arts stamp from the Big Hugs set and some white gel pen stitches.

Challenge:
post signature

Friday, May 6, 2011

Birthday Tunnel Card

I have a special card to share with you today. My friend Georgiana over at CarsonsCricutCreations.blogspot.com challenged me to enter a sketch challenge after I commented that I have such a hard time with sketches.  Well, I agreed to enter the Mojo Monday Sketch Challenge and here is my entry.

Here is the front of my card. I followed the sketch on my Gypsy, doing my best to match the dimensions.

Here is a close-up of my little tag, using a Studio G stamp and a rhinestone to finish it off.

I love this little slip of paper. I used a square punch to make the banner shape and added three more rhinestones. The Birthday cake (two part stamp) is from Stampendous - "Birthday Circles." I accented all the pieces with black borders.

The inside is a tunnel card. Here is the Gypsy file for it:
Tunnel Card.gypsy on 4 Shared
I used Plantin Schoolbook and Accent Essentials

You can find my tutorial for tunnel cards here:

Teacher Appreciation Cards


The inside of the flower is another birthday stamp.  I think it's also Stampendous (but I've had it forever so I'm not positive anymore).

 I am entering this card into the following challenges:

post signature

Monday, April 18, 2011

Sun and Clouds Card


If you haven't yet, please take a second to enter my 400 follower giveaway!

Depending on where you live, Spring may be showing it's face.  Here in the Great Northwest, we are breaking all types of cold temperature and rain fall records so we are SOOO ready for Spring to get here.

I have a card I made today hoping that the clouds will part and we will at least SEE the sun in the next week or so!  If the weather forecasters are right, we just might have some dry and warmer weather coming our way.

Look how the sun is shining through the clouds on this Birthday card. I love the shimmer paper on this card! I attached the circle layer of the sun's center with pop dots.  I also attached the cloud with pop dots.

I love these little stamps from Close to My Heart. I punched the sentiment circle with a 1" circle punch.I inked the edges of the three layers of the sun in orange ink with a finger dauber.  I inked all other layers with blue ink. 

I added white gel pen stitches to the shadow of the sun and clouds layer as well as the blue layer of the card base.

I looped hemp around the card base layer before attaching it to the card base.

The card measure 3 1/2" x 6". A while ago I found a stash of envelopes so occasionally I make cards to fit them... I find it easier to make cards to fit envelopes other than the other way around. I inked the edges of the envelope to match the card.

Cartridges used:
Celebrate with Flourish Lite
Sun and it's layers cut at 3"

Other supplies:
ATG glue runner
Scotch Quick Dry Glue
white craft hemp from Dollar Tree
Bazzil card stock in blue shimmer
DCWV autumn mat stack - adhesive backed
blue and orange ink
finger dauber
pop dots
Gelly Roller white gel pen
CTMH sentiment stamp from "Seasonal Celebration" D1112

Challenges:
post signature

Monday, March 21, 2011

My first Shutter Card

First of all, thanks for stopping by today, 
second... I really think this card need more work. For some reason I am not happy with it, but instead of continue to mess with it (and eventually screwing it up) I am sharing it.


Here is a card I made over the last few days.  It's my very first shutter card.  If you need a tutorial for this card a video really is the way to go.  Just search for "shutter card" on Youtube and you'll be set! :)

Here is the inside, it features all Scrappy Mom's Stamps and some four layer flowers from Walk in My Garden, white gel pen stitching and this paper that has unbalanced blue, yellow and white plaid paper. The yellow stripes are velvet!!

Here are the flowers from the front of the card.  It is a border feature from Walk in My Garden for the tulips (cut at 2 1/2") and I covered the flower heads with the sunflower cut (cut at 1").

Here you can see a better view of the inside.  I added Gelly Roll white gel pen all over the front and inside. The card body is heavy weight card stock from Bazzill.

When I stamped this "So Grateful" stamp I masked off the rest of the stamp that read "for you" to keep with the "Thank you" theme of my card.

Here is a close up of the four layerd flower.  I cut four layers for each of the flowers and stack them up when assmbling them.  I then added some Studio G glitter glue to the centers.

Cartridges used:
Walk in my Garden

Other supplies:
Bazzill card stock
a Martha Stewart punch (sorry I don't remember the name)
Gelly Roll white gel pen
ATG glue runner
Scotch Quick Dry Glue

Challenges:

post signature

Tuesday, March 8, 2011

St. Patrick's Day Card


Today I have a wonderful little card to share with you. At the end of this post, I'll share the Cricut Cartridges and stamps I used as well as some awesome challenges!

As you can see, this is a pot of gold shaped card. I'm in LOVE with shaped  cards lately!!  


Here is the little leprechaun holding a shamrock.


Here you can see all the stitching I added with my gel pen.


I used my glue gun to attach three little green buttons.
 I think buttons add so much character to cards!


The inside details include a circle of green pattern paper and a couple of gold pieces.


Like the front, the inside got plenty of gel pen stitches.

Supplies:
generic black stock base
green card stock
green pattern paper is from Big Lots
Gold metallic paper is DCWV
Green buttons are from Michaels dollar bins
tan card stock
white crafting string / twine
Gelly Roller white gel pen
Scotch Quick Dry Glue
ATG glue runner
pop dots
inside sentiment CTMH: Seasonal Celebrations
face stamp is Sizzix Dress up faces

Cricut Cartridges used:
Pot of Gold / Cauldren from Paper Doll Dress Up (cut @ 4 1/4")
same cut for card base (welded and flipped with my Gypsy)
Simply Charmed for the leprechaun (cut @ 3")
A Child's Year for the shamrock (cut @ 1")
Plantin Schoolbook for the circle (cut 3")
Simply Charmed for the gold pieces (cut @ 4 1/4")

Challenges:
Use at least one button
Must have green
Any kind of leaf
Must have pot of gold


post signature

Monday, February 21, 2011

Watering Can Shaped Card


Today I made a card that I just instantly fell in love with... 
I may have to keep it for myself!!

Here is the whole card. It's a watering can shaped card.


I added five button flowers, added brad centers, and glitter.
I tied this cute little double looped bow with my Bow Easy.


The "Happy, Happy Birthday!" stamp is from Scrappy Moms Stamps.
I added gel pen stitches all around the card! :)


More glitter glue on the spout of the watering can.

All cuts from Walk in my Garden.

I am entering this card into the following challenges:

post signature